Last post I talked about the germination phase of this 'project' that is underway. Well, roots are starting to grow and take hold.
There is something both exciting and frightening about what is going on. I want to run forward with complete abandon - like a child sprinting for the playground after many days stuck inside, or the employee flying home after a long work week. That's the reckless part of me speaking. The responsible part keeps saying, "Hold on sister! Take a breath... don't be impatient, we'll get where we need to be in good time."
Thankfully there is a responsible side that is much, much stronger and can anticipate bumps and struggles and pitfalls, and is working to make a plan of action before diving head-long into the uncertainty of what sits before me.
At this point a small catalogue of products is being produced, order forms are printed and pricing is being negotiated. What is more, yesterday I took a Food Safe Level 1 course (recommended for the level of production I'm at) and passed with a perfect score!
That said, things are moving forward, even if it seems like it's at a snail's pace. What is the saying? Don't rush a good thing. I won't rush... I will be patient and persistent like the tortoise and hope that my efforts provide a decent return.
11.17.2013


5.23.2013
A Place to Call My Own
Tulip bulbs are typically planted in autumn. Throughout the cold winter months, those bulbs work quietly and subterranially to plant deep, lasting roots - roots which will sustain it for years to come, to hold it in place and, no matter how the seasons change, allow it to resurface every year, bold and beautiful.

It seems that a dream in the form of a resilient bulb has been planted in Auntie M's head which has been taking root over the past 10 years. Now it is spring and that bulb is starting to show signs of life, of breaking through the soil and showing itself to the light of day.
Have you ever had a dream? One that, no matter the circumstances or doubts or uncertainties keeps nagging at you, willing you to give it attention? to give it form and voice? That is what is happening here, and it has taken up a tenacious hold on me!!
There is still much to gain, much to learn, much to sort through and work out - it may be the work of another 10 years, who knows? But one thing I do know for sure: after years of wandering through the fields of life, acting on whims and whispers, I have something to work towards, a specific goal to achieve, and am excited to see it come into being!

5.17.2013
Head full of Ideas!
Auntie M'z Kitchen has been working up a storm and considering new ideas, projects and... of course... recipes!
Take a look below at some of the latest treats from the oven!!
Keep an eye open for new developments in Auntie M'z Kitchen, as there are some pretty exciting things in store :)
Take a look below at some of the latest treats from the oven!!
 |
| just formed - first rising |
 |
| little spine to hold in all that goodness |
 |
| four mini loaves - sweet gifts for some sweet folk |
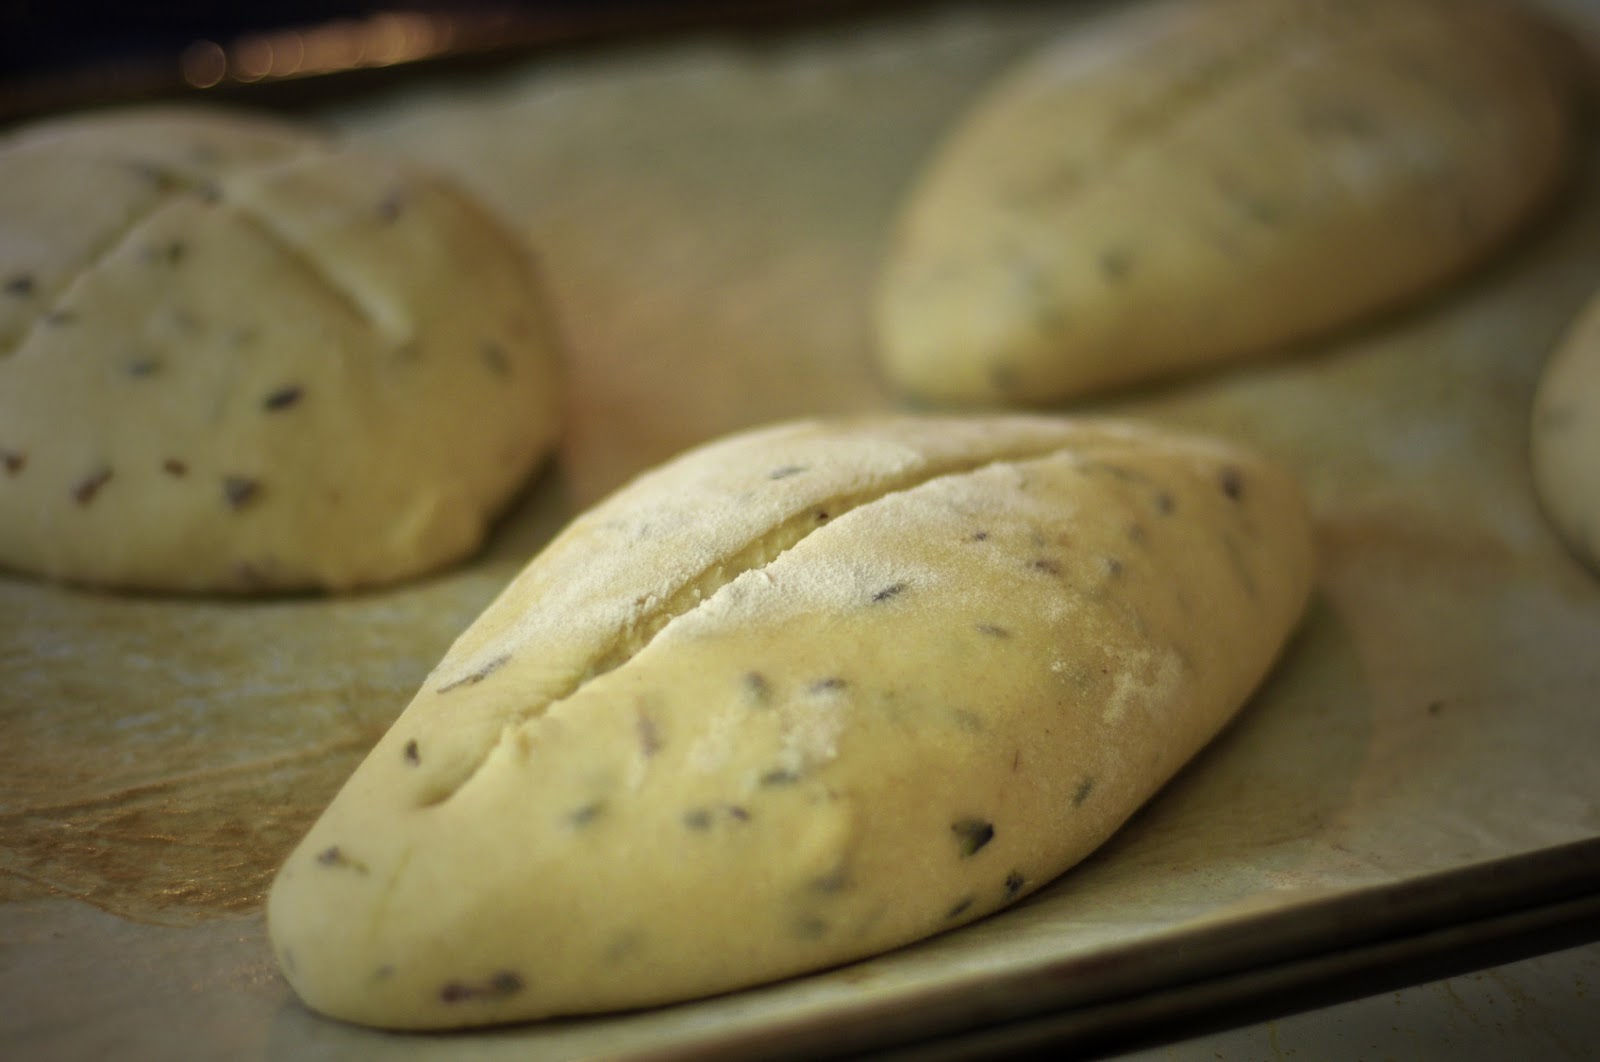 |
| score! trying a few things out here |
 |
| final product - voilà! |
Keep an eye open for new developments in Auntie M'z Kitchen, as there are some pretty exciting things in store :)
11.05.2012
Christmas Cards
Yep, I'm coming back to that theme since we are now 1 month and 20 days away!
My church is selling Christmas Cards in support of Doctors Without Borders, as they did last year, and I think it's a fantastic way to raise money, especially as crises bubble up all over the globe in various forms and regions.

Since Christmas is often considered a time of giving, I got to thinking: maybe someone else would consider buying a set of cards to share with others as a form of raising money for another charity or cause that is dear to them.
On that note, I would like to offer the following:
Anyone interested in purchasing a set of cards (50 or more) for the express purpose of fundraising will receive a special discount of $1.50 per card. That means every penny earned above that is your for donation.
Please email me for more details and to arrange delivery. On orders of 100+ cards, I will also waive shipping charges. How's that for a deal!!
Happy Giving!
~ Auntie M. ~
My church is selling Christmas Cards in support of Doctors Without Borders, as they did last year, and I think it's a fantastic way to raise money, especially as crises bubble up all over the globe in various forms and regions.

Since Christmas is often considered a time of giving, I got to thinking: maybe someone else would consider buying a set of cards to share with others as a form of raising money for another charity or cause that is dear to them.
On that note, I would like to offer the following:
Anyone interested in purchasing a set of cards (50 or more) for the express purpose of fundraising will receive a special discount of $1.50 per card. That means every penny earned above that is your for donation.
Please email me for more details and to arrange delivery. On orders of 100+ cards, I will also waive shipping charges. How's that for a deal!!
Happy Giving!
~ Auntie M. ~
9.07.2012
Getting Started
Starting a project like this isn't easy. It takes time. It takes thought. It takes guts and confidence.
This is partially why it has taken 2 years to finally take the first step in building my hobby into something beautiful: an opportunity to share the joy I get out of my craft with others. Having had ample amount of time off to consider, reconsider, work out and then decide has also helped give direction and vision which were previously lacking.
For a long time friends and family have been pressing me to make a living out of photography - to get out there and assert myself as a creative artist. While their encouragements are greatly appreciated, I can say with all honesty, that will never be my intention. There are so many people with digital cameras who are flooding the cyber world with their art, and with today's technology, it is easy for anyone to get fantastic photos in a *snap*.
Thankfully, my need for regularity, schedules and security keep me steady and I can accept that if someone likes my work and wants to invest in it, they are welcome to, but in no way will I allow the necessity of having to take pictures rob me of the enjoyment found in it. For now, when photography is frustrating or trying or simply boring, I can set it aside - let it rest on the counter for a week, a month, a year if needed. The freedom to do that allows it to remain a creative art instead of a burden, always pressing to be new, different, exciting, pleasing. When it's a job, you don't have that choice, you must press on.
Marketing has begun. It's a start. I will be fully operational and ready to go by October (physically and mentally, that is) but without the assumption of being "in business" and without the stress of having to make it work.
If it does, great. If it doesn't, at least I can say I gave it a shot!
Thank you for your support,
Auntie M.
This is partially why it has taken 2 years to finally take the first step in building my hobby into something beautiful: an opportunity to share the joy I get out of my craft with others. Having had ample amount of time off to consider, reconsider, work out and then decide has also helped give direction and vision which were previously lacking.
For a long time friends and family have been pressing me to make a living out of photography - to get out there and assert myself as a creative artist. While their encouragements are greatly appreciated, I can say with all honesty, that will never be my intention. There are so many people with digital cameras who are flooding the cyber world with their art, and with today's technology, it is easy for anyone to get fantastic photos in a *snap*.
Thankfully, my need for regularity, schedules and security keep me steady and I can accept that if someone likes my work and wants to invest in it, they are welcome to, but in no way will I allow the necessity of having to take pictures rob me of the enjoyment found in it. For now, when photography is frustrating or trying or simply boring, I can set it aside - let it rest on the counter for a week, a month, a year if needed. The freedom to do that allows it to remain a creative art instead of a burden, always pressing to be new, different, exciting, pleasing. When it's a job, you don't have that choice, you must press on.
Marketing has begun. It's a start. I will be fully operational and ready to go by October (physically and mentally, that is) but without the assumption of being "in business" and without the stress of having to make it work.
If it does, great. If it doesn't, at least I can say I gave it a shot!
Thank you for your support,
Auntie M.
7.30.2012
New Cards!
New set of greeting cards has finally arrived!

This is only the first batch to see how they would turn out and - wow! - what an impression they have made. Collection includes birthday cards, blank cards and Christmas cards. That's right, it's never too early to get ready for Christmas (less than 5 months away).
Printed by MOO.com, they are fantastic quality and I am very pleased with how they turned out.
Selling for 3.00 CAD each, or 2 for 5.00 CAD plus shipping.
To place an order for greeting cards shown in the above image or for enquiries, you may contact me at auntiemzplayce@gmail.com. Limited availability on above stock.
Images and stock will grow as interest develops, and customization is available; check out Auntie M'z Greetings for more details!
New Look!
Welcome to the new Auntie M'z site!
 What once was reserved for food talk alone has developed into something a little more rooted in using my gifts to bring joy to the lives of others.
Don't get me wrong, I still love food, and will likely talk about it in abundance. But this space is taking on a new look along with a new direction.
Thank you for stopping by and, as things develop, we'll see what we can grow out of this online forum.
Kindly yours,
Auntie M.
 What once was reserved for food talk alone has developed into something a little more rooted in using my gifts to bring joy to the lives of others.
Don't get me wrong, I still love food, and will likely talk about it in abundance. But this space is taking on a new look along with a new direction.
Thank you for stopping by and, as things develop, we'll see what we can grow out of this online forum.
Kindly yours,
Auntie M.
8.22.2011
Cheezey Bread à la Auntie M
An instant hit, even a bit of a surprise :)
1/2 cup warm water
2 packages (1 1/2 tablespoons) active dry yeast
1 1/2 cup milk
1/3 cup sugar or 2 tbsp honey
1/4 cup butter
1 tbsp salt
1 large egg
2 cups shredded cheese (I used cheddar)
5-6 cups flour
1) In a large bowl, combine water and yeast. Let sit until yeast is dissolved, about 5 min.
2) Heat milk on stove-top until warm. Add sugar (or honey), salt and butter. Stir until butter is just melted.
3) Remove milk from heat and cool to lukewarm. Stir into dissolved yeast.
4) Add egg and cheese and beat until smooth.
5) Add flour one cup at a time until forms a nice smooth dough. You may end up using more or less flour depending on the consistency of your mix.
6) Knead for 10 min and set in an oiled bowl, covered, for one hour.
7) Punch down and form into loaves (using either bread pans for standard shape or rounded loaves/buns on baking sheet).
8) Let rise for another 30 min.
9) Bake in oven at 375 F for 30 min, depending on your oven. Bake until crust is golden and bottom sounds hollow when tapped.
Original recipe from Joy of Cooking 75th Anniversary edition, though I made some slight modifications. Another nice touch is to score the loaf before baking and top with shredded cheese as well. You can never have too much cheese!!
1/2 cup warm water
2 packages (1 1/2 tablespoons) active dry yeast
1 1/2 cup milk
1/3 cup sugar or 2 tbsp honey
1/4 cup butter
1 tbsp salt
1 large egg
2 cups shredded cheese (I used cheddar)
5-6 cups flour
1) In a large bowl, combine water and yeast. Let sit until yeast is dissolved, about 5 min.
2) Heat milk on stove-top until warm. Add sugar (or honey), salt and butter. Stir until butter is just melted.
3) Remove milk from heat and cool to lukewarm. Stir into dissolved yeast.
4) Add egg and cheese and beat until smooth.
5) Add flour one cup at a time until forms a nice smooth dough. You may end up using more or less flour depending on the consistency of your mix.
6) Knead for 10 min and set in an oiled bowl, covered, for one hour.
7) Punch down and form into loaves (using either bread pans for standard shape or rounded loaves/buns on baking sheet).
8) Let rise for another 30 min.
9) Bake in oven at 375 F for 30 min, depending on your oven. Bake until crust is golden and bottom sounds hollow when tapped.
Original recipe from Joy of Cooking 75th Anniversary edition, though I made some slight modifications. Another nice touch is to score the loaf before baking and top with shredded cheese as well. You can never have too much cheese!!
3.07.2011
3.06.2011
Banana Muffins
So, banana muffins. They're great, right?
But there are HUNDREDS of recipes out there and this is just one of them, however this one is guaranteed to be moist and ooey-gooey-good!
Of course, anything made in Auntie M's kitchen is always a variation on a theme, but this recipe is sure to make a fan out of those who (like me!) hesitate on the banana muffin field!
Banana 'Airport' Muffins
You will need:
In a large bowl, mix together until smooth bananas, sugar (honey), egg and butter. Set aside.
In a separate bowl, combine the remaining ingredients. Add slowly to the large bowl until just blended.
Divide into prepared muffin tray (should make 12 regular/large or 6 jumbo). Bake 20 min or until toothpick inserted comes out clean. Enjoy!

But there are HUNDREDS of recipes out there and this is just one of them, however this one is guaranteed to be moist and ooey-gooey-good!
Of course, anything made in Auntie M's kitchen is always a variation on a theme, but this recipe is sure to make a fan out of those who (like me!) hesitate on the banana muffin field!
Banana 'Airport' Muffins
You will need:
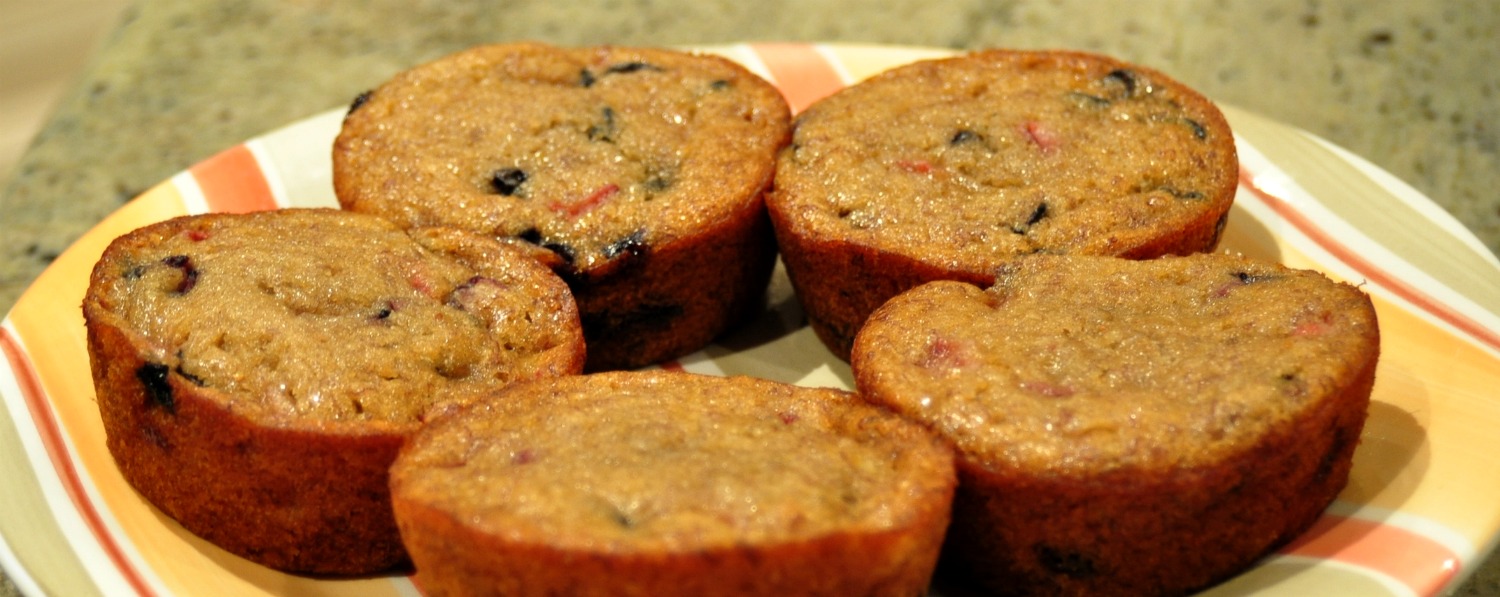
- 4 large bananas, mashed (although, the pic below has 2 ban., 1/2 cup blueberries and 7 med strawberries - mmm! fruity!)
- 3/4 cup sugar (and, in Auntie M fashion, I made them with honey and only 1/2 cup)
- 1 slightly beaten egg
- 1/3 cup softened butter
- 1/2 tsp baking soda
- 1/2 tbsp baking powder
- 1/2 tsp salt
- 1 1/2 cup flour
In a large bowl, mix together until smooth bananas, sugar (honey), egg and butter. Set aside.
In a separate bowl, combine the remaining ingredients. Add slowly to the large bowl until just blended.
Divide into prepared muffin tray (should make 12 regular/large or 6 jumbo). Bake 20 min or until toothpick inserted comes out clean. Enjoy!
2.28.2011
Lenten Lentil Soup
Admittedly, I was hesitant at first - it looked kinda frothy and unappealing.
But trust me! If you hang in there, it becomes something yummy and delicious and oh-so-very appetizing!
Lenten Lentil Soup (courtesy of Bingham's kitchen)
Combine in a large pot
Slowly bring contents to a boil over medium heat. Cover and simmer over low-heat for 2 1/2 - 3 hours.
Quick, easy, super tasty and very lenten friendly!
But trust me! If you hang in there, it becomes something yummy and delicious and oh-so-very appetizing!
Lenten Lentil Soup (courtesy of Bingham's kitchen)
Combine in a large pot
- 2 cups lentils (green/brown/red)
- 4 cups cold water
- 1 tbsp salt
- 1/4 tsp pepper
- 1/2 cup butter or margarine
- 1 large can tomatoes
- 1 large white onion, diced
- 2 tbsp fresh dill
- 2 cloves garlic, crushed
- 2 large bay leaves
Slowly bring contents to a boil over medium heat. Cover and simmer over low-heat for 2 1/2 - 3 hours.
Quick, easy, super tasty and very lenten friendly!
2.20.2011
Valentine's Dinner
We don't celebrate Valentine's Day, but it happened that hubby's daughter and boyfriend came over for dinner and we decided to treat them and celebrate on their behalf.

From our Pasta Making class, not only did we learn how to make spaetzle, but also half-moons and ravioli. The dough for the half-moon pasta can also be used to make lasagna noodles, spaghetti, fettucini, and so on. For our Valentine's Dinner, we decided on pesto linguini with home-made alfredo shrimp sauce!

End result? Success! Here it is below:
Pasta Dough:
note - this recipe makes enough dough for 5 meals, serving 4-6 people. If you do not need that much dough, 1/2 or 1/4 the recipe for a single serving.
 In a mixer, combine flour, semolina, pesto mix and oil. Add eggs one at a time and mix until it looks kinda like cookie dough. Remove from bowl and knead until it is smooth and elastic-y. For those accustomed to making bread, the dough feels 'heavier' and more dense, but you are still looking for a smooth, velvety texture, like play-doh.
 Wrap dough ball(s) in plastic wrap and let sit in fridge for 2 - 24 hrs. Dough will keep up to 7 days, but best used right away.
When ready to cook the pasta, bring a large pot of salted water to a rolling boil. Keep the water at a boil to sustain movement int he pot.
 Using a pasta machine, roll out the dough into thin sheets. You can use a rolling pin, but *beware* - will cause extensive forearm strain as the dough is quite tough. Using the cutting tool on the machine, run the dough sheets through to get your pieces (we did linquini).
Blanch fresh pasta, cooking 2-4 minutes depending on your preferred texture. Remove from water and toss in olive oil or prepared sauce.
Auntie M's Alfredo Shrimp Sauce:
In saucepan over medium-low heat, combine butter and flour to make a roux base, stirring with a whisk until there are no lumps.
 Add cream and continue stirring until blended. As bubbles form, reduce heat and let simmer, stirring constantly (don't let it burn!!)
As the sauce thickens, add salt & pepper to taste*. Let sit for 5-7 minutes.
* For a spicy flare, you can also add ground chili flakes or cayanne pepper *
Stir in shrimp. The juices from the shrimp should give the sauce a more fluid texture, and will provide body to the flavor. Cook until shrimp are just turning pink.
Pour over prepared pasta, mix, sprinkle with chopped parsley and serve HOT!


End result? Success! Here it is below:
Pasta Dough:
note - this recipe makes enough dough for 5 meals, serving 4-6 people. If you do not need that much dough, 1/2 or 1/4 the recipe for a single serving.
- 6 cups all purpose flour
- 2 cups semolina (if you cannot get this, use 7 1/2 cups flour instead)
- 12 eggs
- 150 mL olive oil
- dry pesto mix (I used a pre-made organic powder blend)
 In a mixer, combine flour, semolina, pesto mix and oil. Add eggs one at a time and mix until it looks kinda like cookie dough. Remove from bowl and knead until it is smooth and elastic-y. For those accustomed to making bread, the dough feels 'heavier' and more dense, but you are still looking for a smooth, velvety texture, like play-doh.
  Wrap dough ball(s) in plastic wrap and let sit in fridge for 2 - 24 hrs. Dough will keep up to 7 days, but best used right away.
When ready to cook the pasta, bring a large pot of salted water to a rolling boil. Keep the water at a boil to sustain movement int he pot.
 Using a pasta machine, roll out the dough into thin sheets. You can use a rolling pin, but *beware* - will cause extensive forearm strain as the dough is quite tough. Using the cutting tool on the machine, run the dough sheets through to get your pieces (we did linquini).
Blanch fresh pasta, cooking 2-4 minutes depending on your preferred texture. Remove from water and toss in olive oil or prepared sauce.
Auntie M's Alfredo Shrimp Sauce:
- 1/4 cup butter
- 1/4 cup flour
- 1/2 cup parmasean cheese
- 3 cups cream (10% or higher)
- salt & pepper to taste
- 1 bag (30-40) uncooked shrimp

In saucepan over medium-low heat, combine butter and flour to make a roux base, stirring with a whisk until there are no lumps.
 Add cream and continue stirring until blended. As bubbles form, reduce heat and let simmer, stirring constantly (don't let it burn!!)
As the sauce thickens, add salt & pepper to taste*. Let sit for 5-7 minutes.
* For a spicy flare, you can also add ground chili flakes or cayanne pepper *
Stir in shrimp. The juices from the shrimp should give the sauce a more fluid texture, and will provide body to the flavor. Cook until shrimp are just turning pink.
Pour over prepared pasta, mix, sprinkle with chopped parsley and serve HOT!

2.12.2011
Handmade Spaetzle!
Hubby and I attended a cooking class last week to expand our experiences. What a delight it was. Even my husband exlaimed, "That was so much fun; let's do it again!" which, coming from him, is a HUGE compliment.
What I liked best about the class was they gave handouts for the recipes to take notes for tips and tricks to better understand what you're looking for when making it yourself. In addition, we got to sample each dish on the list!
What I did not like was that it wasn't hands-on learning, so that when you get home you kind of have to guess how the textures should feel when you're working with the dough either in preparation or cooking.
 Below is my first experience making a German doughy-delight: Spaetzle! Though not served in a traditional fashion (baked with an inordinate amount of cheese and bacon and sausage), it was a decent first attempt. Hubby Rating: 7/10
In a large bowl, whisk together
Bring to a rolling boil a large pot of salted water. Prepare an ice-water bath in a large bowl (water with ice cubes in it; cold refrigerated water works too, but has to be replenished after every use).

Using a spaetzle maker, push batter through into the boiling water, making sure to create movement in the water so the pieces don't clump together. Cook for about 2 minutes.

With use of a porous spoon or basket ladle, scoop spaetzle noodles out of the boiling water and deposit in ice-bath to cool and set. Remove and drain. Toss in olive oil.

It is normal to either bake or fry the spaetzle once made. I tried to fry ours but the batter was a little too moist and the noodles were a tad on the gluey side, so didn't fry up so well. While the noodles were being cooked, I had heated up some roast beef and diluted gravy we had from a previous dinner. This was poured over top the noodles and served hot. Super delicious, even if the texture was off!
What I liked best about the class was they gave handouts for the recipes to take notes for tips and tricks to better understand what you're looking for when making it yourself. In addition, we got to sample each dish on the list!
What I did not like was that it wasn't hands-on learning, so that when you get home you kind of have to guess how the textures should feel when you're working with the dough either in preparation or cooking.

In a large bowl, whisk together
- 6 large eggs
- 1/4 cup milk or cream
- 2 cups flour
- 2 tbsp butter, softened
Bring to a rolling boil a large pot of salted water. Prepare an ice-water bath in a large bowl (water with ice cubes in it; cold refrigerated water works too, but has to be replenished after every use).

Using a spaetzle maker, push batter through into the boiling water, making sure to create movement in the water so the pieces don't clump together. Cook for about 2 minutes.

With use of a porous spoon or basket ladle, scoop spaetzle noodles out of the boiling water and deposit in ice-bath to cool and set. Remove and drain. Toss in olive oil.

It is normal to either bake or fry the spaetzle once made. I tried to fry ours but the batter was a little too moist and the noodles were a tad on the gluey side, so didn't fry up so well. While the noodles were being cooked, I had heated up some roast beef and diluted gravy we had from a previous dinner. This was poured over top the noodles and served hot. Super delicious, even if the texture was off!
Auntie M's Chocolate Bailey's Eggnog Cake
A mouthful, in every meaning of the term!
Eggnog Cake (for those who aren't partial to eggnog - myself included - this is nothing like it!)
I used the following recipe to make the cake part, so nothing original there. It was smooth and creamy (the batter, at least) and the aroma, as it seeped into the kitchen, was intoxicating!
The only difference is that I added 1/4 cup rum and only 1 cup eggnog so the liquid conent was similar to the recipe.
Chocolate Bailey's Buttercream Icing:
To compose an icing from one's head can be daunting. I used:
Add butter and blend until nice and creamy.
Add Bailey's and mix well.
This will make a significant amount of icing. For the Eggnog Cake you will only need about 1/2 - 2/3 of the recipe. Great for a layerd chocolate cake too. The liqueur gives a nice snap!
Add more honey to sweeten if you like.
In my adventures I also found a recipe for EGGNOG! So if you are interested in making the above cake as a non-festive treat, you can use the following recipe to make eggnog yourself and enjoy this delicate dessert all year 'round.
Eggnog:
Combine in a saucepan:
In a large bowl, whisk together until fluffy,
Whisk in the hot milk slowly in with the eggs until combined. Pour everything back into the saucepan and cook over medium head, stirring constantly, until thick. Do not allow mixture to boil.
Strain to remove cloves and let cool for about an hour.
When cooled, stir in
Chill before serving. Enjoy with whipped cream and cinnamon powder!
Eggnog Cake (for those who aren't partial to eggnog - myself included - this is nothing like it!)
I used the following recipe to make the cake part, so nothing original there. It was smooth and creamy (the batter, at least) and the aroma, as it seeped into the kitchen, was intoxicating!
The only difference is that I added 1/4 cup rum and only 1 cup eggnog so the liquid conent was similar to the recipe.
Chocolate Bailey's Buttercream Icing:
To compose an icing from one's head can be daunting. I used:
- 1 pkg light cream cheese
- 1/2 cup Chocolate Bailey's liqueur
- 1/2 cup unsalted butter, softened
- 1/4 cup honey (softened if you're not using liquid honey)
Add butter and blend until nice and creamy.
Add Bailey's and mix well.
This will make a significant amount of icing. For the Eggnog Cake you will only need about 1/2 - 2/3 of the recipe. Great for a layerd chocolate cake too. The liqueur gives a nice snap!
Add more honey to sweeten if you like.
In my adventures I also found a recipe for EGGNOG! So if you are interested in making the above cake as a non-festive treat, you can use the following recipe to make eggnog yourself and enjoy this delicate dessert all year 'round.
Eggnog:
Combine in a saucepan:
- 4 cups milk
- 5 whole cloves
- 1/2 tsp vanilla
- 1 tsp ground cinnamon
In a large bowl, whisk together until fluffy,
- 12 egg yolks
- 1 1/2 cups sugar
Whisk in the hot milk slowly in with the eggs until combined. Pour everything back into the saucepan and cook over medium head, stirring constantly, until thick. Do not allow mixture to boil.
Strain to remove cloves and let cool for about an hour.
When cooled, stir in
- 4 cups cream
- 2 tsp vanilla extract
- 1/2 tsp ground nutmeg
- 2 1/2 cups rum (optional)
Chill before serving. Enjoy with whipped cream and cinnamon powder!
2.03.2011
Auntie M's PB Pancakes
Pancakes in general are pretty straightforward.
A basic recipe reads something like:

1 cup flour 3/4 cup milk
1 tsp baking powder 1 egg
1 tbsp sugar 1 tsp vanilla
Mix in a bowl and fry in a pan. Simple! For the more adventurous, you can add or substitute ingredients as desired, such as adding chopped apples or jam or cocoa powder or chocolate chips, berries... the list goes on, really!
My own culinary tastes tend to go against anything basic, so I have used this quick from the brain recipe and modified it to make a tasty, filling and healthy breakfast option!
Auntie M's PB Pancakes (Peanut Butter & Banana)
yields approx 15 med-sized pancakes
In small bowl mix together the following dry ingredients:
 1 cup all-purpose flour (can use whole wheat if you like)
1/4 cup oat or wheat bran
1 tsp (heaping) baking powder
dash of sea salt
Set aside the dry ingredients. In a medium/large bowl, blend together
1/2 cup unsweetened organic peanut butter
1/2 cup liquid honey
3/4 cup unsweetened almond milk
1 large ripe banana
1 tsp vanilla
Tip: I used a Magic Bullet to blend the milk, banana and vanilla together - way easier than doing it by hand. I also melted the PB and Honey so that the texture was easier to combine with the other moist ingredients.
 Stir the dry ingredients into the larger bowl until well blended. The batter will be a little lumpy, that's ok!
Drop portions of the batter onto a prepared frying surface. Flip when small bubbles have formed on top - careful not to burn them!
Enjoy 'as is' or with jam. Because there is so much honey, they shouldn't need to be sweetened anymore, although I would never object to a splash of maple syrup!!
A basic recipe reads something like:

1 cup flour 3/4 cup milk
1 tsp baking powder 1 egg
1 tbsp sugar 1 tsp vanilla
Mix in a bowl and fry in a pan. Simple! For the more adventurous, you can add or substitute ingredients as desired, such as adding chopped apples or jam or cocoa powder or chocolate chips, berries... the list goes on, really!
My own culinary tastes tend to go against anything basic, so I have used this quick from the brain recipe and modified it to make a tasty, filling and healthy breakfast option!
Auntie M's PB Pancakes (Peanut Butter & Banana)
yields approx 15 med-sized pancakes
In small bowl mix together the following dry ingredients:

1/4 cup oat or wheat bran
1 tsp (heaping) baking powder
dash of sea salt
Set aside the dry ingredients. In a medium/large bowl, blend together
1/2 cup unsweetened organic peanut butter
1/2 cup liquid honey
3/4 cup unsweetened almond milk
1 large ripe banana
1 tsp vanilla
Tip: I used a Magic Bullet to blend the milk, banana and vanilla together - way easier than doing it by hand. I also melted the PB and Honey so that the texture was easier to combine with the other moist ingredients.
 Stir the dry ingredients into the larger bowl until well blended. The batter will be a little lumpy, that's ok!
 Drop portions of the batter onto a prepared frying surface. Flip when small bubbles have formed on top - careful not to burn them!
Enjoy 'as is' or with jam. Because there is so much honey, they shouldn't need to be sweetened anymore, although I would never object to a splash of maple syrup!!
1.24.2011
Baker's Day
Today I made some delicious treats that are not only tasty, but also good for me (and likely you too!)
First on the board was a batch of banana muffins, with a twist! Because I'm completely incapable of following a recipe from beginning to end as written, here is how I put these yummy breakfast bites together!
Banana Bran Muffins à la Auntie M.
Preheat oven to 350 F (180 C)
In a small bowl, whisk together the following dry ingredients and set aside:
- 1 cup whole wheat flour
- 1 cup oat bran
- 2 tsp baking powder
- 1/2 tsp salt
- 1/2 tsp cinnamon
In a large bowl mix together:
- 1/3 cup raw honey
- 1 cup unsweetened almond milk (rice or soy milk will work too)
- 2 med size ripe bananas, mashed
- 1 egg (room temperature)
- 3 tbsp vegetable oil
Add dry ingredients to the large bowl and stir until just mixed. Let sit 5 min.
While waiting, chop up the following 'extras' into fine pieces:
- 2/3 cup dried cranberries
- 1/2 cup walnuts (can be replaced with almonds or pecans, as desired)
- 1/2 cup ground flax
Fold extras into dough and divide out into muffin pan (should be just enough for 12 med/large). Bake for 18-22 minutes, or until toothpick inserted comes out clean. Let cool in tray.
Base recipe from 'The Complete Baking Cookbook' by George Geary, published by Robert Rose Inc. Modifications include select ingredients and process.
The second thing I made was a batch of my all-time favourite cookies. They're my fav because they don't need a lot of sugar to be really good, and they are packed with healthy fillers so that I don't have to feel too bad about eating them *snicker*.
What also makes these cookies special is that they are from a cookbook given to me by my dad right before he died, so they have extra meaning for me and I can remember him every time I make them... which is often!
Apple-Cranberry Oat Cookies à la Auntie M.
In a small bowl, whisk together the following dry ingredients and set aside:
- 1 cup whole wheat flour
- 1/4 cup wheat or oat bran
- 1/2 tsp baking powder
- 1/4 tsp nutmeg
In a large, warm bowl cream together the following ingredients, mixing after the addition of each additional item:
- 1/2 cup unsalted butter
- 1/2 to 2/3 cup raw honey
- 1 egg (room temperature)
- 1 tsp vanilla
Add flour mixture to the large bowl and stir until well blended. Fold in the following fillers:
- 1 cup quick-cooking oats (not instant oats)
- 1/2 cup chopped dried cranberries
- 3/4 cup chopped apple (golden delicious work well, nothing too sweet or too tart)
Drop heaping spoons of cookie dough onto a prepared cookie sheet, about 2 inches apart. Bake in preheated oven for 10-12 minutes or until edges are lightly browned (will depend on your oven).
Base recipe from 'Dietitians of Canada - Cook Great Food' published by Robert Rose Inc. Modifications include select ingredients and quantity. Original recipe says it makes 36 but I only ever get 15-20 doz at 1.5 oz per cookie.
First on the board was a batch of banana muffins, with a twist! Because I'm completely incapable of following a recipe from beginning to end as written, here is how I put these yummy breakfast bites together!
Banana Bran Muffins à la Auntie M.
Preheat oven to 350 F (180 C)
In a small bowl, whisk together the following dry ingredients and set aside:
- 1 cup whole wheat flour
- 1 cup oat bran
- 2 tsp baking powder
- 1/2 tsp salt
- 1/2 tsp cinnamon
In a large bowl mix together:
- 1/3 cup raw honey
- 1 cup unsweetened almond milk (rice or soy milk will work too)
- 2 med size ripe bananas, mashed
- 1 egg (room temperature)
- 3 tbsp vegetable oil
Add dry ingredients to the large bowl and stir until just mixed. Let sit 5 min.
While waiting, chop up the following 'extras' into fine pieces:
- 2/3 cup dried cranberries
- 1/2 cup walnuts (can be replaced with almonds or pecans, as desired)
- 1/2 cup ground flax
Fold extras into dough and divide out into muffin pan (should be just enough for 12 med/large). Bake for 18-22 minutes, or until toothpick inserted comes out clean. Let cool in tray.
Base recipe from 'The Complete Baking Cookbook' by George Geary, published by Robert Rose Inc. Modifications include select ingredients and process.
The second thing I made was a batch of my all-time favourite cookies. They're my fav because they don't need a lot of sugar to be really good, and they are packed with healthy fillers so that I don't have to feel too bad about eating them *snicker*.
What also makes these cookies special is that they are from a cookbook given to me by my dad right before he died, so they have extra meaning for me and I can remember him every time I make them... which is often!
Apple-Cranberry Oat Cookies à la Auntie M.
In a small bowl, whisk together the following dry ingredients and set aside:
- 1 cup whole wheat flour
- 1/4 cup wheat or oat bran
- 1/2 tsp baking powder
- 1/4 tsp nutmeg
In a large, warm bowl cream together the following ingredients, mixing after the addition of each additional item:
- 1/2 cup unsalted butter
- 1/2 to 2/3 cup raw honey
- 1 egg (room temperature)
- 1 tsp vanilla
Add flour mixture to the large bowl and stir until well blended. Fold in the following fillers:
- 1 cup quick-cooking oats (not instant oats)
- 1/2 cup chopped dried cranberries
- 3/4 cup chopped apple (golden delicious work well, nothing too sweet or too tart)
Drop heaping spoons of cookie dough onto a prepared cookie sheet, about 2 inches apart. Bake in preheated oven for 10-12 minutes or until edges are lightly browned (will depend on your oven).
Base recipe from 'Dietitians of Canada - Cook Great Food' published by Robert Rose Inc. Modifications include select ingredients and quantity. Original recipe says it makes 36 but I only ever get 15-20 doz at 1.5 oz per cookie.
9.29.2009
And so it came to pass that many wonderful things were made : )
1) Pie was fabulous! Have not made a pie that beautiful and tasty in all my history of making pies (which is about 12 years now...) Perhaps this is the beginning of a very happy relationship between me & pastry. Recipe for the foolproof pie dough can be found here.
2) I made the most delicious pizza too while in the throws of cooking. Quick tip: if using sausage as a topping, fry it up with some white onions before topping the pizza. Adds a special zest! Also, alternative to pizza sauce = tomato paste + salsa. Yum!
 3) Chickpeas are still rock-hard. Anyone!? Please!!
4) Tomorrow it's the pumpkin scones. I have been wanting since Thursday of last week to make them and by-golly I WILL make them tomorrow! What a way to usher in October.
5) Also hot on the Autumn cook-list is buttercup squash. Perhaps tomorrow I'll post a recipe for Buttercup Delight - a soup I've been making to enjoy this seasonal gourd.

1) Pie was fabulous! Have not made a pie that beautiful and tasty in all my history of making pies (which is about 12 years now...) Perhaps this is the beginning of a very happy relationship between me & pastry. Recipe for the foolproof pie dough can be found here.
2) I made the most delicious pizza too while in the throws of cooking. Quick tip: if using sausage as a topping, fry it up with some white onions before topping the pizza. Adds a special zest! Also, alternative to pizza sauce = tomato paste + salsa. Yum!
 3) Chickpeas are still rock-hard. Anyone!? Please!!
4) Tomorrow it's the pumpkin scones. I have been wanting since Thursday of last week to make them and by-golly I WILL make them tomorrow! What a way to usher in October.
5) Also hot on the Autumn cook-list is buttercup squash. Perhaps tomorrow I'll post a recipe for Buttercup Delight - a soup I've been making to enjoy this seasonal gourd.

9.26.2009
Black Bean & Corn Salad
Doesn't sound like much but WOW - what a light, irresistible treat. Perfect for those of you who are trying to keep tabs on your mid-section or calorie count, better yet for those of you who, like me, simply love to eat!!

Best part of this recipe: a lot of "add to taste". This way, if you want a bit more 'punch' add more jalapeño. If you want something sweeter, add more red pepper. Make it your own!
I'd like to have a bit of a contest to see who can come up with the best name, since this name is a little 'blah' for such a fresh and taste-bud inspiring salad. Post names as comments and we'll vote on the titles.
In a med-sized bowl, whisk together:
1/4 cup mayonnaise
2 1/4 tbsp lime juice (fresh squeezed if you can! about 1 med-sized lime)
1 tsp cumin
1 small can nibblet corn
1 cup quartered cherry/grape tomatoes
1/2 cup red onion, finely chopped
2 tbsp cilantro, finely chopped
1 jalapeño pepper, seeds removed*
1/2 orange/yellow/green/red pepper, finely chopped**
 Best served with Tostios Scoops
* - jalapeño peppers can be pretty strong. I don't like even mildly spicy food so only used half a small j/p. Add more to taste as you like.
** - pepper in this case can be added for flavour or for colour. Keep in mind that there is already a lot of red with the tomatoes and green with the cilantro. Yellow or Orange might work best if you are trying to enhance the colour pallet.

Best part of this recipe: a lot of "add to taste". This way, if you want a bit more 'punch' add more jalapeño. If you want something sweeter, add more red pepper. Make it your own!
I'd like to have a bit of a contest to see who can come up with the best name, since this name is a little 'blah' for such a fresh and taste-bud inspiring salad. Post names as comments and we'll vote on the titles.
In a med-sized bowl, whisk together:

1/4 cup mayonnaise
2 1/4 tbsp lime juice (fresh squeezed if you can! about 1 med-sized lime)
1 tsp cumin
Add to this:
1 19oz can black beans, rinsed1 small can nibblet corn
1 cup quartered cherry/grape tomatoes
1/2 cup red onion, finely chopped
2 tbsp cilantro, finely chopped
1 jalapeño pepper, seeds removed*
1/2 orange/yellow/green/red pepper, finely chopped**

* - jalapeño peppers can be pretty strong. I don't like even mildly spicy food so only used half a small j/p. Add more to taste as you like.
** - pepper in this case can be added for flavour or for colour. Keep in mind that there is already a lot of red with the tomatoes and green with the cilantro. Yellow or Orange might work best if you are trying to enhance the colour pallet.
9.01.2009

8.28.2009
Roast Beast
I know it's a little early for roast beast (yes, I'm highly influenced by Dr. Seuss) because the summer's still here and we are all trying to hold on to the last threads of that perceived freedom the word 'summer' seems to carry with it, but I couldn't help tempting my husband into Autumn with a nice warm dinner last night!

We've discovered it's quite nice - and heat reducing - to cook our roasts on the BBQ instead of in the oven. A trick picked up from a friend: gauge the roast many times with a small paring knife and insert into the gauges (or slits) slices of fresh garlic. 1 clove sliced thinly should work fine for a small-med sized roast.
I also made roasted potatoes - his favourite - with gr. onions and garlic slices. Tip for roasting potatoes on the BBQ: par-boil before wrapping in foil. Keep both the roast and potatoes on the top rack of the BBQ so they don't burn.
The real adventure of dinner was the Yorkshire puddings! Holy moly! All that effort for something so temperamental. Will have to find another recipe as the one in the Joy of Cooking didn't satisfy my attempts. They rose, but were quite doughy. Not like I remember them to be.
Finally, to add the vegetable element (because for me, a meal without fruit or veggies is not a full meal!) I used this fabulous recipe from my cousin for Squash Casserole with some modifications: recipe below.


We've discovered it's quite nice - and heat reducing - to cook our roasts on the BBQ instead of in the oven. A trick picked up from a friend: gauge the roast many times with a small paring knife and insert into the gauges (or slits) slices of fresh garlic. 1 clove sliced thinly should work fine for a small-med sized roast.

I also made roasted potatoes - his favourite - with gr. onions and garlic slices. Tip for roasting potatoes on the BBQ: par-boil before wrapping in foil. Keep both the roast and potatoes on the top rack of the BBQ so they don't burn.
The real adventure of dinner was the Yorkshire puddings! Holy moly! All that effort for something so temperamental. Will have to find another recipe as the one in the Joy of Cooking didn't satisfy my attempts. They rose, but were quite doughy. Not like I
 remember them to be.
Finally, to add the vegetable element (because for me, a meal without fruit or veggies is not a full meal!) I used this fabulous recipe from my cousin for Squash Casserole with some modifications: recipe below.
3 cups Butternut squash - chopped then cooked until done (modification: 1 1/2 cups squash + 1 1/2 cups cooked and mashedcarrots)
1 onion chopped finely
2/3 Cup shredded cheese ( modification: mozzarella cheese; it's creamier)
15 Ritz crackers crushed (keep a few extra crackers for the topping)
1 egg beaten
2 Tbls. Miracle Whip (modification: pureed cauliflower; less calories)
Mix ingredients in an oven-safe casserole dish. Top with shredded cheese and crushed Ritz crackers (this will give it a nice crispy shell). Bake at 350 degrees for 45-60 min.

In the end, while not a "low-cal" meal by any stretch, it was fabulous and tasty!! Thoroughly enjoyed.

Subscribe to:
Posts (Atom)